Take a look at any seasoned angler’s setup and you’ll be hard pressed to find a fishing kayak without more than a few custom modifications. After you have Selected the Best Fishing Kayak and you’ve spent a few trips on it you will quickly realize that a rod holder would be more convenient here, or your fish finder would be easier to reach if it was there. The fact is that modifying your kayak to tailor your needs and comforts will ultimately optimize and make ease of your time on the water.

Electronics
Installing a fish finder on your kayak will absolutely help you on your hunt for fish. If you are on a pedal kayak, it is important to know water depth so your drive unit does not run aground. Virtually every fishing electronics manufacturer offers smaller sonar units that are the ideal size for a kayak. But if you have the fish finder mounted towards the bow of the kayak, you may want something larger, like a seven-inch screen that will be easier to see from four to five feet away.
When it comes to mounting your transducer, there are several options. There are a few different styles of track-mounted transducer arms available that can easily be flipped up out of the water as needed. Another option is to affix the transducer with silicone inside the hull of the kayak. However, this method can be met with mixed results of effectiveness. There are also scupper-mounted transducers, and some companies are now including pre-installed transducer mounts on the hull of the kayak.
A 12-volt 10-amp sealed lead acid battery will typically do the trick to power a fish finder for a whole day and then some, before the need for recharging. Many companies are now offering lithium ion battery packs that are a fraction of the weight of traditional batteries and can carry much more power, but will cost a tad bit more.
Get Rolling
A select few companies have wheels integrated into their kayak, but for the most part a solid cart for getting your kayak around is essential. If you ever get sick of toting around a cart and having to strap it on every single time you load/launch, then there are other options. The landing gear from BooneDOX features an integrated wheel system that installs onto the stern of your kayak using your existing tracks, or by adding mounting plates to a flat area of your deck. Once you’ve wheeled your kayak to the water, the aluminum legs and wheels simply rotate up and out of the way. The downside is that you do have to be in a few feet of water to deploy or disengage the landing gear. You also must be conscious of your hull weight when transporting via the landing gear as excessive weight can result in damage to your kayak. But speaking from experience, the overall convenience of this upgrade is worth the investment.

Hull Protection
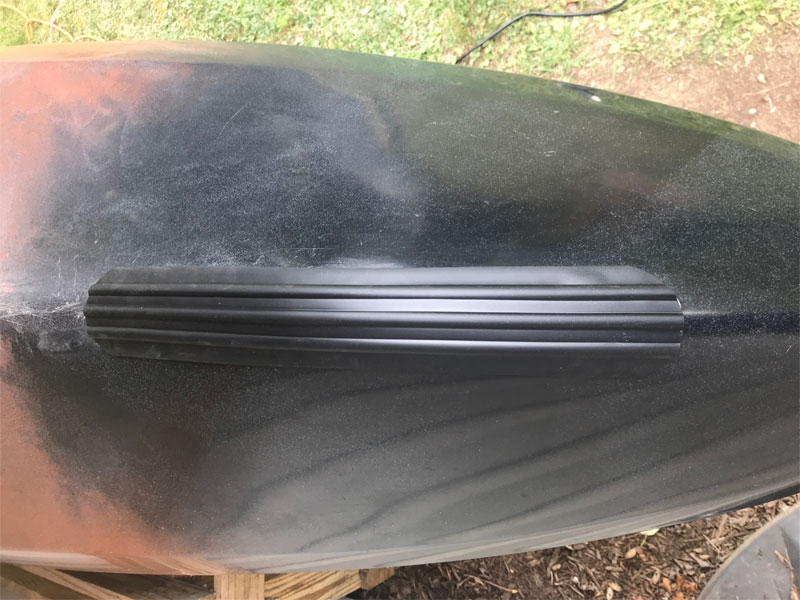
How many years of dragging over dirt, rocks, and sand can your plastic kayak withstand? If you want to get the most out of your investment and enjoy it for years to come, adding some hull protection is a good idea. High-density polyethylene is a relatively non-stick material so permanent adhesion can be a challenge. There are several keel guards available that are specifically designed for canoes and kayaks. I recently installed a One Objective Keel Protector onto one of our kayaks and after several rigorous trips is still holding up great.
Many kayak anglers suggest coating worn areas with Gorilla Tape, which can get the job done on a budget. But the tape can easily get chewed up on rocky terrain and release glue into the water. For that reason this method is less than environmentally friendly.
If you’re shopping for a new kayak, a feature to look out for are plastic sacrificial skid plates that some manufacturers are now adding to their kayak hulls.
Tackle Management
With being confined to one spot in a kayak, it is a good idea to have your critical gear within arm’s reach. Building a custom crate for storage of your tackle and gear in the rear tank well is great, but you have to constantly twist and reach behind you. Installing an under-seat tackle storage system has been a blessing in having two tackle boxes immediately accessible. Pockets for pliers and fish grips are also a must have and there are several gear track retractable tethers on the market for snips and other tools. Tackle trays are also an excellent addition if you’re someone who likes to quickly swap lures. Customize your tray by adding a magnet to keep lures from sliding around.
Accessory Mounts
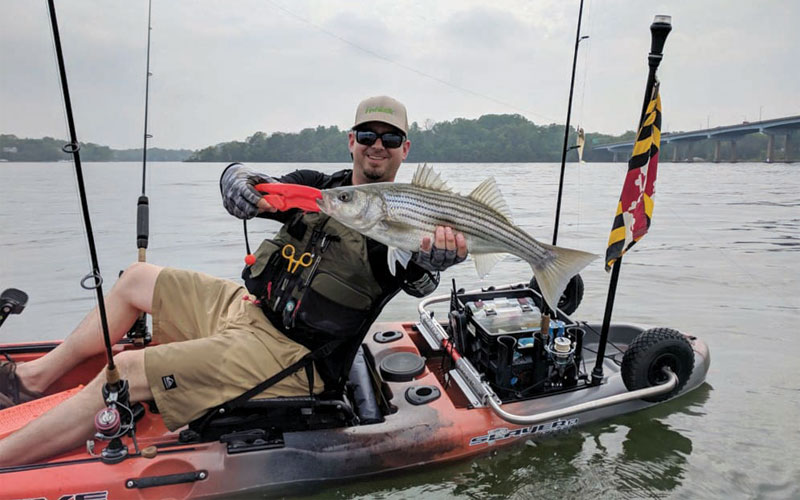
Of course rod holders on a fishing kayak are a no-brainer. I have 10 on mine. Reason being is that the vertical tubes on the crate can also be used for stashing items like a flag pole, pliers, or grips. Up front, I prefer several mounting points for various accessories such as rod holders, a camera, or fish finder mounts. There are many aftermarket mounting options to choose from companies such as Railblaza, Scotty, YakAttack, and Ram Mounts. It’s best to stick with one brand so that everything is interchangeable. That way you can move things around based on the type of fishing you’re doing. For example, if you’re trolling you’ll want rod holders on both port and starboard sides. But if you’re drifting with live bait, you may want the rod holders on the same side of the boat. Having one style also enables you to use the same attachments on multiple kayaks.
So in short, spend some time with your kayak and get your feels for what works best for you. There are many upgrades out there to customize your kayak that can help you make the most of your fishing days.
~ By Zach Ditmars