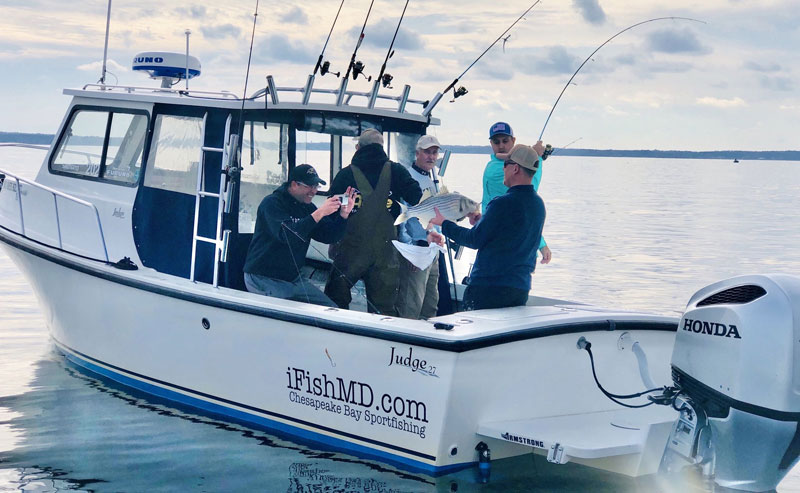
As water temperatures fall striped bass begin to school up as they follow the bait out of the rivers — making for some of the best light tackle fishing anywhere in the world. Knowing how to maximize the use of your electronics can greatly increase your efficiency and success rates in this fishery. Here are three tools that help me greatly.

Finding Birds
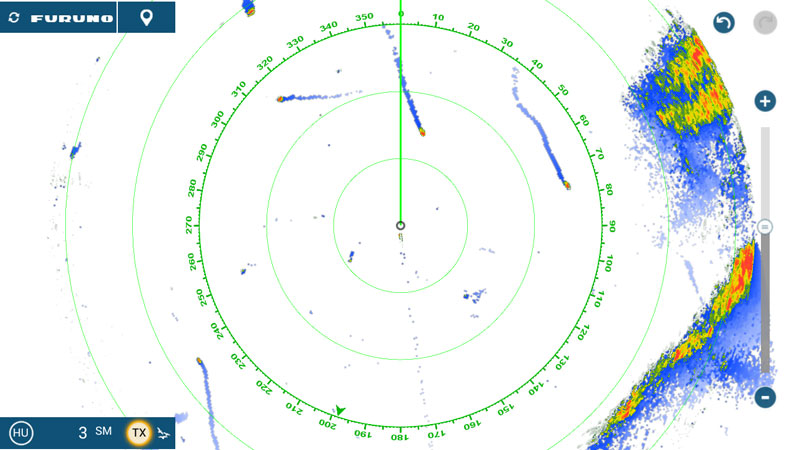
The first thing most people think of when fall approaches is looking for bird activity. While binoculars, particularly stabilizing binoculars, can be about the most effective tool for finding birds, radar is also a fantastic tool to use in locating flocks of birds over schooling fish. You do not need a high dollar open array unit to effectively use radar, either. A simple radome set at shorter ranges offers anglers the ability to keep running while looking for birds. Like most newer radar, my Furuno NXT radome offers automatic “bird mode” and when run at shorter ranges, will easily locate larger flocks of birds at up to three miles away. Even when run at the 1.5 nautical mile range, I can see birds at two miles away and this gives me a wide swath of bird-spotting while running down the Bay — without stopping to look through binoculars.
If you do not have a modern radar with automatic bird finding features, turn down your sea clutter and gain up to just where the screen starts to fill in with feedback. This will give you the most energy on the small targets in order to get a return on your screen. Birds will be a less-dense target that rapidly changes in size on the screen. If your radar also has the ability to view trails, which display where targets were over a given period of time, I recommend turning them on to better see the targets as they change in density. I typically set my trails to read at one minute or three minutes in order to be left with highlights to changes in target size. Where my radar really has shined is at first light or just before dark, when birds can easily go unseen viewed against the shoreline.

Finding Fish
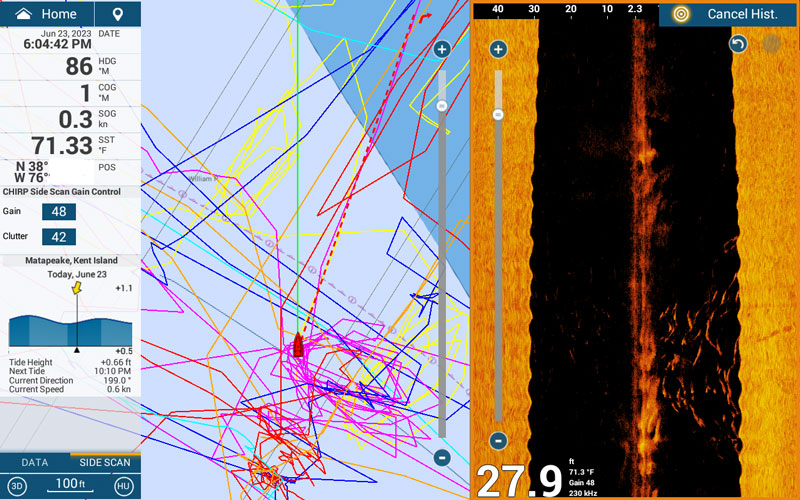
Of course, we do not always have birds to show us the way, or even when birds do show us the way initially they can quickly stop working. This is where the traditional sounder combined with side-scan comes into play. The big game-changer for me came when I added side-scan with my Furuno Navnet TZT3 MFD, which is why it is my second tool to note. Not only could I work with my traditional sounder around ledges, particularly in mouths of rivers or in the vicinity of sitting birds, but I now could cover much greater areas of water without directly being over the fish. I typically like to run at ranges of 80 to 160 feet, which are distances I can reasonably expect to mark schools of fish or even bait balls. Even though I will occasionally run at 230 feet or further, I find that at longer ranges smaller schools of fish can become more difficult to clearly see on the screen.
Pro Tip for Reading Side Scan: don’t only look for rockfish around bait, but also look for bait balls that look like Swiss cheese on the screen. Because bait likes to school up densely, the Swiss cheese appearance usually results from predators attacking and going through the schools. These returns can often show you where the most aggressively feeding fish are.
Finding the Drift
The third tool I wanted to note for increasing your fish-finding electronics efficiency is to use the tracks on your chart plotter. Knowing where you have been while looking for fish, seeing your drifting direction as you set up drifts on ledges or schools of fish, and being able to follow schools of fish as they work their way down ledges or chase bait is invaluable. I actually have two Furuno chart plotters on my boat, a GP1971F and TZT3. I have the tracks feature set up differently on each unit. On my TZT3 I have tracks set up to change colors on every trip. This allows me to see where I have been on the current trip in relation to previous trips, which is very helpful when fishing similar areas from one day to the next.
However, I have my tracks set up to change color based on speed on the GP1971F. This allows me to see my drift track versus the tracks made when I move to set up again (since I typically drift at less than three knots, but will go back to set up another drift at above three knots). This leaves the one color to clearly separate the direction in which I am drifting so I can set up above a piece of structure, a ledge, or a school of fish, without running over them, staying on the bite longer and not scattering the school. Other brand units offer similar features. For example, one boat I occasionally run with a Garmin system was able to be set up to change track colors based on the day of the week. The Furuno also offers a variety of track recording features other than changing color based on speed or trip, such as track color changes based on bottom density (with a bottom discrimination feature compliant transducer) or water temperature change, which would be very valuable to offshore anglers.

In order to know how to take advantage of these features, you may need to explore the internal menus or manual to your particular unit. Learn how to do so and you’ll be better at finding the birds, finding the fish, and finding the drift. And you’ll also be better at catching those October rockfish.
- By Greg Shute
If you have any further questions about how I use these features, feel free to contact me at ifishmd@gmail.com or (410) 533-1435. I am also available for charter.