When a beginner angler learns how to fillet a fish there’s one over-riding rule to remember: there’s more than one way to skin a cat. How you fillet a fish is up to you and you alone, and the end result is the only thing that dictates whether you did the job “right” or not. So, the method we’ll cover here is just one way to go about it. Also remember that a few specific fish may be done differently than the generalized method we’re about to describe. Flounder in particular are a bit unusual due to their unique body shape, pickerel require special attention thanks to their bones, and many very large fish like tuna and swordfish are often steaked or loined rather than filleted. For 90 percent of the species you’ll catch, however, this guide to filleting will get you from the cleaning station to the dinner table.
Step 1: Scaling the Fish. Maybe.
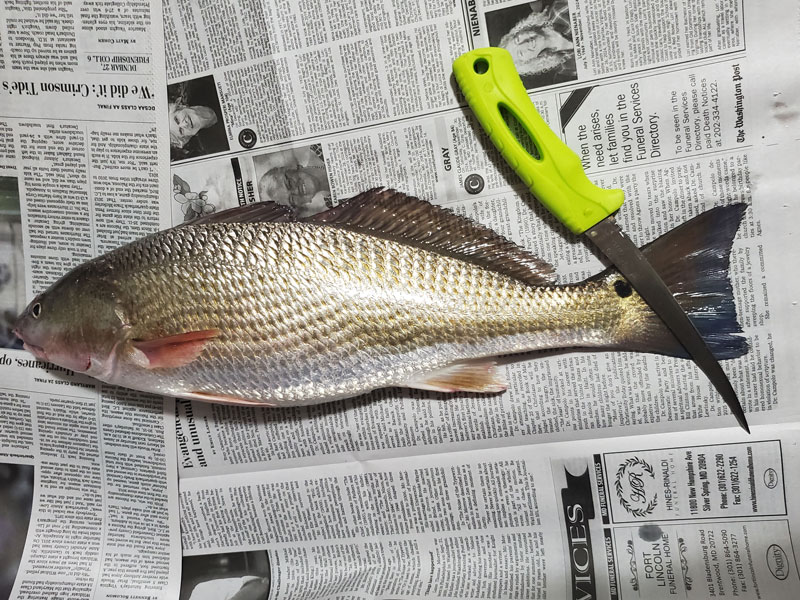
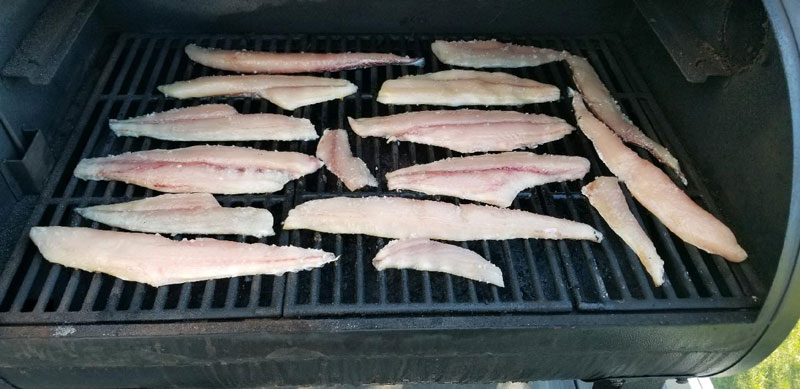
To scale or not to scale? That is the question. If you’ll be skinning your fillets don’t bother, because when you take off the skin the scales go away, too. But if you want to keep the skin intact (often a good move if you’ll be grilling or if you’re dealing with a fish that has soft meat, like speckled sea trout or Spanish mackerel) you’ll have to add this step. And always do the scaling before any cutting takes place, or you might smash the meat or get it covered in scales and slime.
A regular soup spoon works great for scaling, and on fish that are easy to scale you can just use the back of your fillet knife. Hold the fish firmly by the head, start at the tail, and run the spoon from tail to head with just as much pressure as needed to pop the scales off. After removing all the scales, it’s best to wash the fish thoroughly before moving on to filleting.
Step 2: The Initial Fillet Cuts
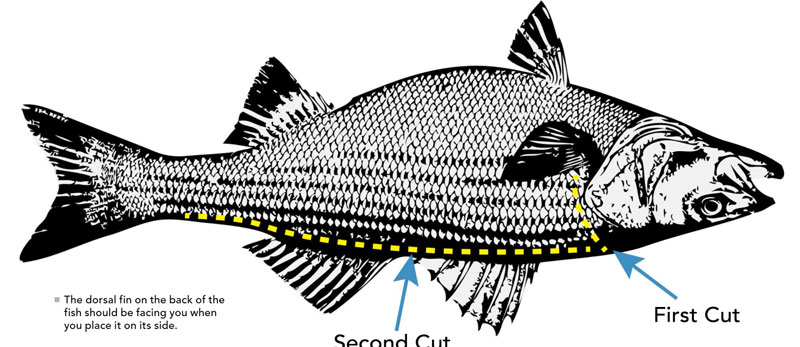
Hold the fish with its back towards you. Always remember to cut away from your hands and fingers, not towards them, to prevent injury. Make an angled incision from the front of the pectoral fin to the back of the fish’s head, going all the way down to but not through the backbone. Then turn the knife parallel to the fish’s back, and slice down along the dorsal and all the way to the tail. Don’t worry about cutting deep into the fish for this initial slice, you’re really just trying to open up the skin.
Step 3: Slicing the Fillet Free
Now go back to the initial slice just behind the fish’s head, and slide the blade along the open skin as close to the vertebrae as possible, from head to tail. Repeat this slice as necessary until the meat has been separated from the vertebrae all the way to the backbone. On a small fish like a perch this may take two or three strokes but on a bigger fish like a slot red, it may take five to seven strokes.
Critical Tip: Use long, smooth slices rather than sawing. Sawing through the meat causes lots of ragged, choppy cuts and generally results in a less appealing fillet that loses bits and chunks when cooking.
Step 4: Finishing Fillet Cuts
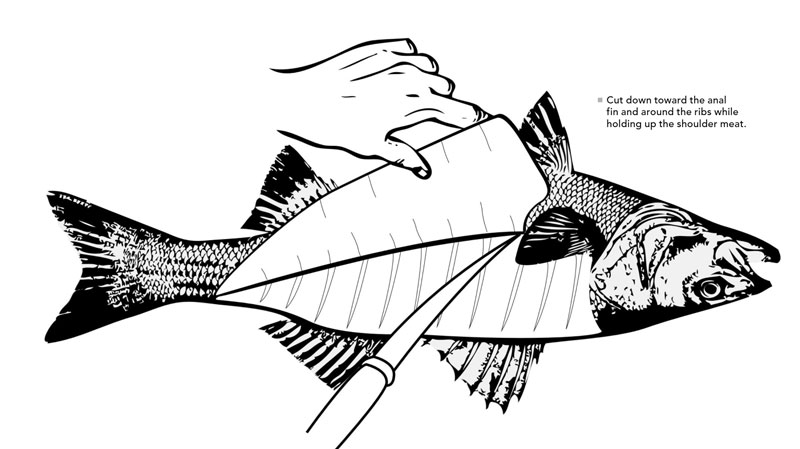
After the tip of the knife is clicking along the backbone, use your other hand to lift the edge of the fillet. Slide the tip of the knife along the top of the backbone; at this point the blade will be hitting rib bones along the fish’s rib cage. You now have a choice: you can slice through those bones and keep the rib cage attached, or slice through the skin and meat just above the rib cage to separate that bony piece from the rest of the fillet. Which way to go is a personal choice. If you don’t mind picking out the bones keep that piece. But if you want to ensure a bone-free fillet you can just leave the rib cage behind. On large fish, you can slide the fillet knife above the rib bones and keep some or most of the meat attached without getting bones in your fillet.
After dealing with the rib cage as you choose, slide the tip of the knife along the far side of the backbone and down along the vertebrae to remove the lower portion of the fillet aft of the rib cage.
Step 5: Skinning the Fillet of Fish. Maybe.
Now you have two options: you can slice the fillet free of the tail, or if you want to skin it, leave it attached. That way you can roll the fillet over so it’s meat-up, and use the fish carcass as a “handle” while sliding the knife along the skin. Most people slice the fillet free and if they want to skin it, use a fork to grip the fillet at the tail-end. But if you try leaving it attached you might find it’s a very convenient method for skinning.
With fish that have soft skin it’s all too easy to slide that knife right through it, and it will take some practice to get the skin off without either slicing through or keeping the blade too high and losing some meat as a result. Don’t be discouraged if the first few tries aren’t perfect. If you do go through the skin, it may be easiest to rotate the fillet 180 degrees then try from the other end. When that becomes necessary, of course, you’ll definitely need a fork to hold the fillet in place.
After doing one side of the fish simply roll it over and get to work on the other side. Don’t be disappointed if the second fillet doesn’t come out quite as nice as the first one did, because working on the first side while the fish is still intact is always easiest. Now, get yourself some corn meal and heat up that oil!